


Methods of Cultivation and CareNorfolk Pine
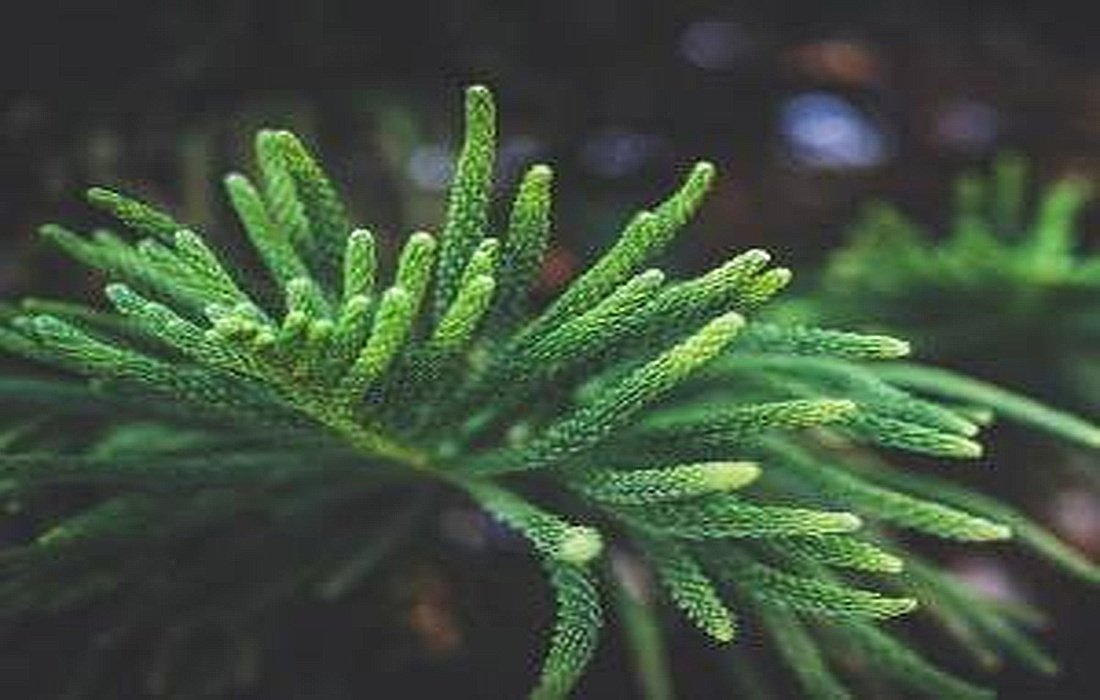
Norfolk Pine is known by many names, including Norfolk Island Pine and Araucaria heterophylla. In the wild, it can grow up to 60 meters tall, with branches reaching lengths of 1.8 meters.

Conditions for Keeping Norfolk Pine at Home
Essential Settings for Norfolk Pine:
Family:Araucariaceae (Araucaria species)
Order:Heterophylla
Species:Norfolk Pine (Araucaria heterophylla)
Unimportant Names:Araucaria heterophylla, Norfolk Pine, Andes Pine
Origin:Norfolk Island, Australia
- They exhibit a conical growth habit.
- They grow up to 2 meters indoors.
- Gray bark –Brownis
- Female cones reach 18 cm, while male cones are about 4 cm.
- Needles are bright to dark green, needle-like, 4-5 mm long.
Norfolk Pine is majestic and grows tall, spreading its branches in high ceilings, creating a bright foundation in suitable living rooms. It is the only type that can be grown indoors.
Norfolk Pine requires regular pruning as a decorative task. Caring for this plant is not easy; it needs a specific substrate, and watering and fertilizing must be done regularly. Gardeners who can maintain it with regular care will always enjoy these cone-shaped trees.
In the wild, Norfolk Pine reaches 60 meters in height. These coniferous trees prefer the mild and cool climate of Norfolk Island in Australia but need a cool site during winter, ranging from 5 to 10 degrees Celsius.
They do not need to be flooded with water; occasional short watering in the morning and evening is good, but they prefer more shade. It should be sprayed with water and requires continuous humidity of around 80%.
Care for Norfolk Pine:
The wonderful idea of having a Norfolk Pine at home rests on a conifer that is actually easy to maintain while secretly fitting well in large, bright rooms and keeping a piece of nature in enclosed spaces.

Suitable Place to Keep Norfolk Pine
Place to Keep Norfolk Pine:
This Norfolk Pine does not like direct sunlight but can tolerate a little during the morning and evening. Otherwise, a shady place with enough space is preferable. It should be very well-lit, as the pine can only thrive otherwise.Light from the sunit requires directly, but it does not need shade.
This is a problem when the room is heated all year round. In summer, it needs temperatures from 18 to 23 degrees Celsius, and in winter, from 5 to 10 degrees Celsius.
Additionally, the Norfolk Pine may require a constant humidity of around 80%, which is difficult to achieve in modern rooms, necessitating regular checks throughout the year. This pine can be frequently sprayed with warm water to achieve this.
If the temperature is consistently between 10 and 15 degrees Celsius, the plant can be placed on a balcony or patio. However, it is essential to ensure that the Norfolk Pine does not receive direct sunlight, especially at noon. The Norfolk Pine grows evenly when rotated regularly around 20 degrees.
Soil Stability for Norfolk Pine:
This plant does not have high expectations of the soil. It does not like overly salty soil, and pure rhododendron soil will not work either.
Requirements for Norfolk Pine:
- Light, loose soil
- Fresh, moderately moist to dry
- Sandy-clay, loose, and highly permeable
Avoid flooding it in water; it’s something that Norfolk Pine can’t tolerate. A suitable substrate with a bit of soil and a support filled with stones and water acts as a drainage system to ensure sufficient moisture on both land and air, which is very suitable.
Layers for Norfolk Pine:
This plant is explicitly kept indoors, so you can only use fresh soil; you can enrich the existing potting soil with shrub soil or azalea soil. Moreover, it’s advised to add perlite, sand, or pumice for better drainage, as the plant dislikes being waterlogged.
You can also test garden soil, plant fertilizer, plant bark, and compost with small stones. It’s important that the pine has enough space in the pot to spread its roots in a dark substrate and that excess water can drain away.
Planting Season for Norfolk Pine:
Your plant loves to be planted in a large pot with fresh soil when it comes directly from garden centers or greenhouses. Often, trees are planted in very cramped spaces that permanently hinder their growth. Suitable places have a bottom hole for a drainage system, which is used to empty sand or pumice drainage.
Planting Norfolk Pine in the Garden:
Since Norfolk Pine should not freeze all year round and prefers moderate temperatures in summer, planting it in the garden is not recommended. Norfolk Pine is primarily a pot plant, at least in Germany.
On mild days between spring and autumn, individuals may place their coniferous trees on their balcony or patio, provided that they can stay in the shade. Because they do not like very sunny spots.

Is it better to plant Norfolk Pine in a pot or garden?
Planting Norfolk Pine in a Pot:
Prepare a pot as described above. An air and water-permeable pot with suitable drainage that keeps the soil out and prevents the drains from getting blocked. Before placing your pine in the newly designed pot, soak the root ball in a bucket of water. There, let it stay until no air bubbles appear.
During this process, spread a layer over the soil and drainage in the bucket. Place your young cone-shaped trees in the center of the pot or bucket in this layer. Press the soil slightly with your fist to avoid creating a hole. Fill in as much as possible until your plant is positioned the same way as before.
If they are planted too deep, the stem may rot. Do not fill the pot to the brim; leave about 5 cm empty above the edge. Thus, any water mixture won’t overflow the soil later.
Watering the Norfolk Pine:
Norfolk Pine is native to a semi-tropical climate where only two seasons exist: the rainy season, a warm plant stage from April to September, and the cold dry winter from October to March.
As a gardener, you need to coordinate the treatment of watering and fertilizing: in spring and summer, it should be watered significantly.
The roots must not dry out completely, but they shouldn’t be waterlogged either. More water should be given when the surface is completely dry. Please use collected rainwater or lime-free water. If there’s a saucer under your Norfolk Pine pot without gravel, you must empty it every 20 minutes.
Fertilizing the Norfolk Pine:
During the main growth phase, you should fertilize your pine with liquid fertilizer every 14 days. Gardeners swear by azalea fertilizer, because this meets the needs of cone-shaped trees more than special formulations for other green plants.
Pruning Norfolk Pine:
Norfolk Pine is a conifer, and like many other conifers, it does not prune itself from woody pieces. Therefore, pruning is very challenging. Fruit trees and other trees in nature require regular pruning to maintain their health and vitality. This differs for Norfolk Pines, where cutting is somewhat reversed. More cutting occurs from the bottom up.
Pruning means that branches apart from the main trunk will be cut, leaving only the crown at the top. Longer branches may be derived. To do this, cut a branch in such a way that the smaller neighboring branch is the target for that cut. You should never cut the top of a Norfolk Pine, but trim it from the bottom.
Wintering Norfolk Pine:
Norfolk Pines enter their winter period in late September and early November. Now the coniferous trees should be moved to a room that is not warm. If it is placed in a typically warm room, it should be relocated. Otherwise, a cool low-heat entrance or a cold garden during winter months is suitable.
Wintering also involves the behavior of leaf shedding and adapted fertilization: maintaining an average temperature between 5°C and 10°C
In the winter months, the plant should be watered less: the amount of water should be slightly reduced, so that the branches and roots do not dry out, and it is not fertilized in winter; sometimes, mild water should be sprayed over the pine wood. The colder the room, the less moisture and water it needs.
Propagation of Norfolk Pine:
Propagation and cultivation of Norfolk Pine is done through seed planting and cuttings, which are somewhat challenging compared to other plants, and it propagates better under greenhouse conditions. In the cutting method, rooting is not the end of propagation, but caring for and maintaining it is very important.

How to Plant and Propagate Norfolk Pine
Planting Norfolk Pine from Seeds:
Make sure to only use fresh seeds from reputable sources and plant them in suitable substrate. The temperature of this planting substrate should be around 12 to 16 degrees Celsius, and all water and light needs of the Norfolk Pine must be met for its growth. Ideally, planting occurs in early spring. The pots should be filled with a mix of coal and sand, placing only one seed in each pot. Cover the substrate and seeds with moist humidity. During the summer months, you should place the planting containers in a cool and nice room. Once the sprouts emerge, you can carefully transfer the plant to the main pot.
Propagation of Norfolk Pine by Cuttings:
Propagation is done in winter. For cuttings, healthy young branches of the plant should be used, and a number of them are cut with scissors or a sharp knife. At least one branch should have the main stem and flower bud. Cut less than 4 cm below the branch of the tree.Nutritious substratesshould fill a 9 cm pot. The seedling should be planted deep enough so that the node is just above the ground. These cuttings must be kept in a greenhouse at 19 to 20 degrees Celsius to provide conditions for rooting. Rooting takes about 2 to 3 months.
To ensure humidity, one suitable method is to cover the soil surface with clear plastic or glass. Of course, to secure oxygen and air exchange, it’s better to occasionally remove the cover and place it back on the soil to prevent the plant from getting moldy and rotten. Once you see the sprouts, remove the plastic from the pot. Don’t worry about losing a few white sprouts as this is normal.
Several factors are highly effective in this method: 1. Timing of cutting 2. Age of the mother plant 3. Conditions and hygiene points that should definitely be remembered before propagation.
Roots do not regenerate. As a result, amateur gardeners tend to plant pot plants and grow them for three years. During this time, cone-shaped trees grow large enough to produce beautiful sprouts. These young seedlings quickly turn into a delicate and beautiful young Norfolk Pine within months.
Diseases of Norfolk Pine:
The only significant disease that can affect the pine wood is root rot: a brown color and spots grow and lead to plant death.
Pests ofNorfolk Pine::
Thrips:
They have bright spots with high suction power. This pest is nearly imperceptible, and you may only find about 1 millimeter of them and their larvae. So-called winged or bubble-footed thrips are almost invisible and usually found only in greenhouses.
Therefore, your conifer trees might have previously brought pests from their previous growing environment or garden center since thrips only fly short distances but can go far. They wander around on the ground and feed on plant sap, weakening the plants. Thus, quality control before buying Norfolk Pine is essential.
Scale Insects:
You will not see them yourself. These creatures are covered with white wax and settle on the branches of cone trees and on the leaves of conifers. They hardly move and infect the plant. Combating these scale insects is only possible with pesticides and special chemicals that do not harm the plant.